Removing edge fringes and halos from Photoshop Cutouts.
In this Photoshop tutorial, I’ll show you how to fix edges to make them perfect. Often when cutting out images you are left with dark or light edges. These are called halos or fringes. They are easily removed and I’ll show you exactly how I like to do it. These are other options such as using the matting tools in Photoshop to fix the edges, but I prefer this method for photos of people, because I don’t want to treat the hair the same as the skin areas. If you do that, you will risk creating “helmet hair”. To fix the hair, I like to use the refine brush in Select and mask and can be found in my extracting tutorials. More tutorials listed at the bottom.
Speaking of other tutorials, feel free to use the search bar at the top of PhotoshopCAFE (It works really well) and you will discover tons of other useful tutorials, just like this one.
Check out the video to see the steps and then read the written instruction for clarity and reference. (bookmark and share this page)
Let’s begin with a photo I recently shot, while preparing images for my Lightroom Classic training course here at the CAFE. (Thanks Callan, for modeling for me). Here is a photograph I have cut out and you will notice the dark edges around the skin. (I placed it on this bright background to make it easy for you to see the edges).

Zooming in for a close look, You can see the edges are very obvious and need some work. (Don’t worry about the hair, the focus on this tutorial is the hard edges).
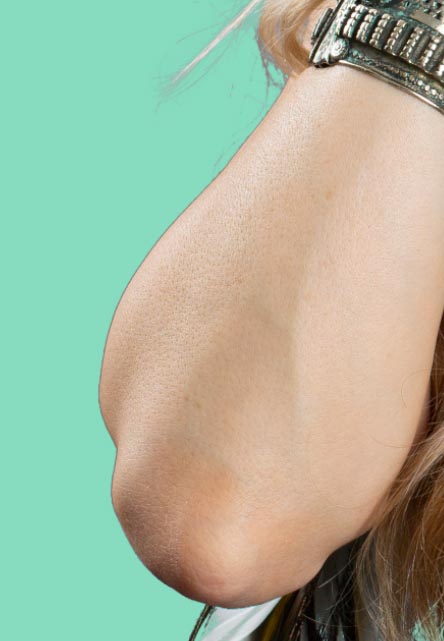
Step 1 // Load the selection.
Hold down Ctrl/Cmd and click on the layer was thumbnail (Ctrl+click the layer instead if you didn’t use a mask)
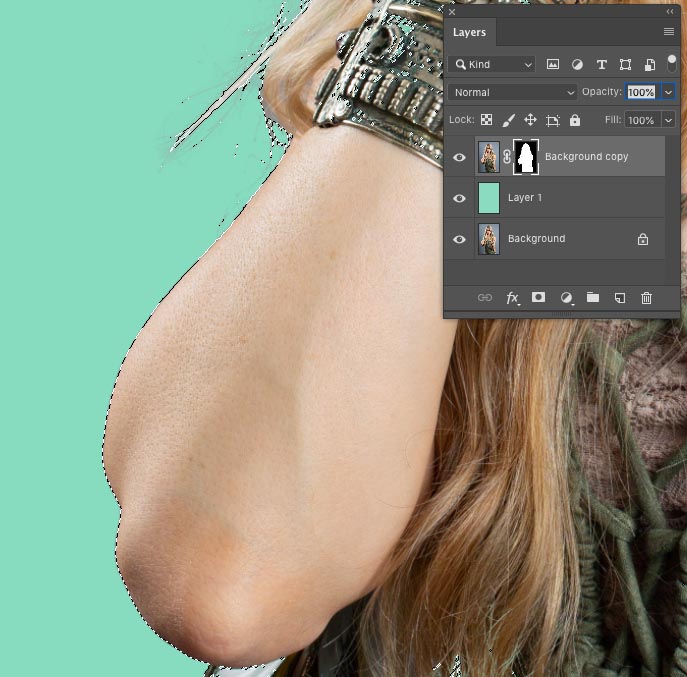
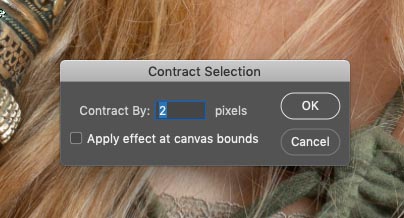
Step 2 // Contract the selection.
Choose Select>Modify>Contract and enter a setting of 2 pixels
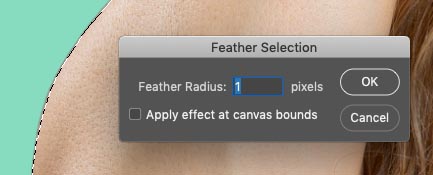
Step 3 //
Choose Select>Modify>Feather. Set it to one pixel.
Step 4 //
Right now we need to swap the selection, so that the outside is selected and just the 2 pixels of the outside edge.
Press Ctrl/Cmd+Shift+I or select>inverse from the menu

Step 5 // brush away the edge halo
Choose a brush and set the color to black and the opacity to 100
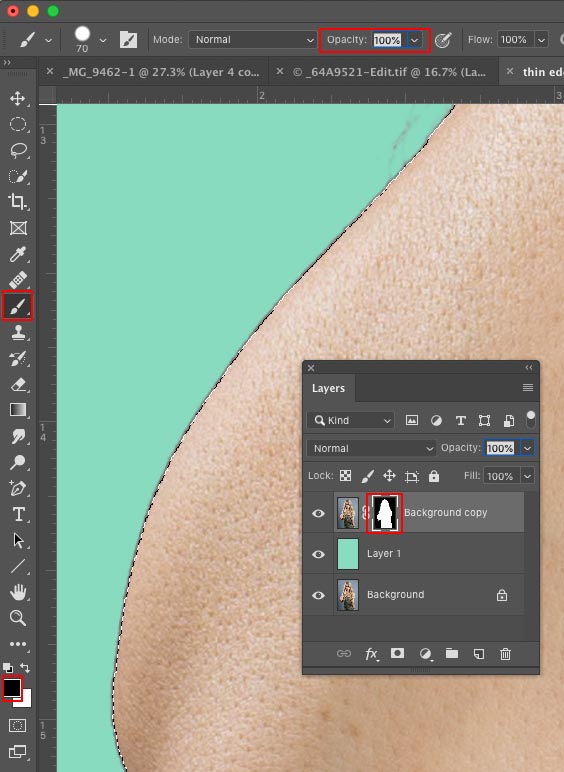
Step 6. //Paint the edges
With the layer Mask selected Paint on the edges and you will see the fringe disappear and a nice smooth edge as you paint. Sometimes, you may need to paint over the edge 2x if you aren’t getting the desired result in the first pass. The feather allows for 2 passes.
I pressed Ctrl/Cmd+H to hide the selection so I can see better while repairing the edge.
(If you extracted on the layer instead of using a mask, use the eraser tool instead).
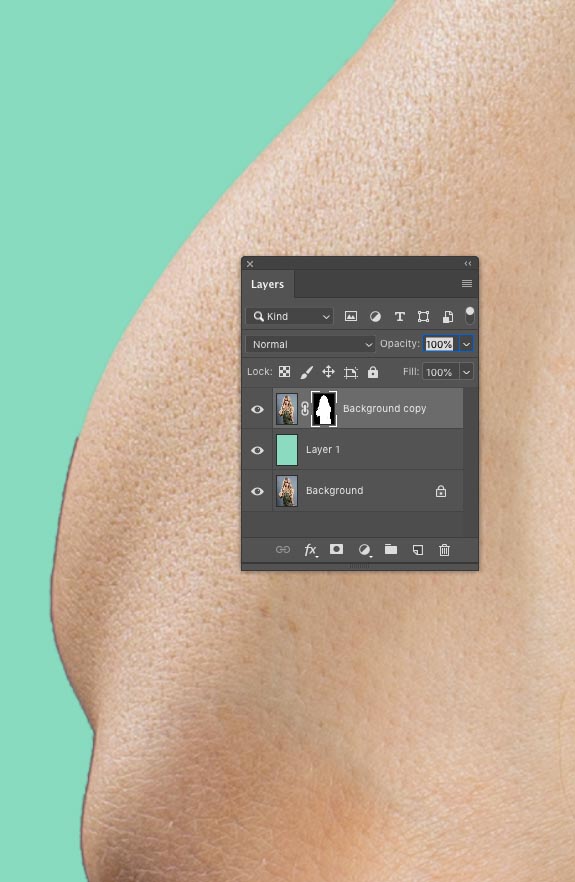
Conclusion
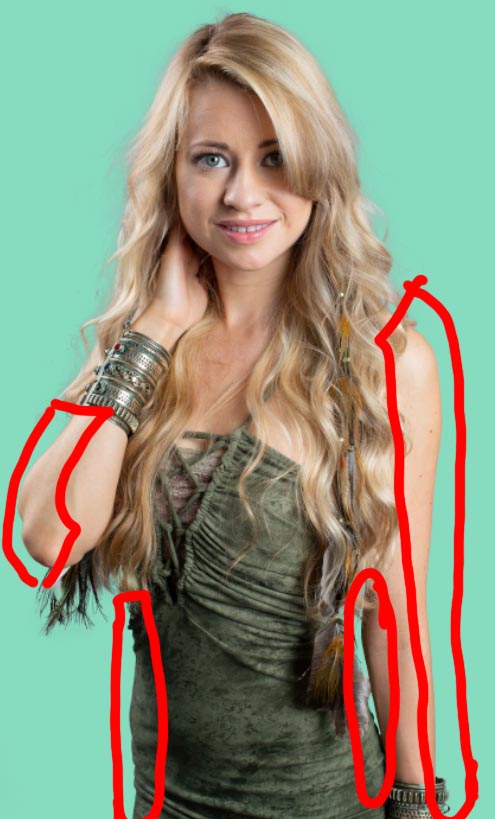
To finish up the piece, I painted around all the indicated edges.
Photoshop CC Selection Secrets
New Course by Colin Smith
Stop
struggling with selections. Learn how to select and cut out anything
from people, hair, trees, complex shapes and even transparency.
Discover how to get perfect edges, without halos and jaggies. Colin shows you exactly how in 18 lessons.
All the images are included for you to follow along.
You will be able to select and cut out anything: faster and cleaner.
More info here
Here are some of my other tutorials on extracting things from backgrounds in Photoshop
List of some of the Photoshop cutout tutorials here at PhotoshopCAFE. Most contain both video and detailed written steps.
- Cutting out hair and select and mask
- Cutting out impossible images
- Cut out anything in Photoshop
- Cut out Glass, smoke and liquid in Photoshop
- Cut out trees in Photoshop
- Using refine edge
Thanks for checking out this tutorial. Come back for now tutorials every week.
Don’t forget to join our list for more free tutorials and Photoshop tips.
Great to see you here at the CAFE.
Colin
blend mode ebook


